Welcome to
Itgeeks Support
Ensure that all your devices are connected to the best WiFi, from the front door to the back garden. No more dead zones or buffering, just powerful Itgeeks Support WiFi for everyone.
How to Do Itgeeks Support Setup?
Have you have a Itgeeks Support and looking to configure the WiFi device? If so, then you have stumbled upon the right page. Here, we are going to explain each and every step on how to do Itgeeks Support router setup. Let’s get started!
-
Now, plug in your Itgeeks Support satellite to a power socket and turn it on.
Note:
During the Itgeeks Support setup, you are suggested to place your Itgeeks Support satellite in the same room where your router is already placed. However, you can change the location of your Itgeeks Support satellite once done with the Itgeeks Support router setup process.
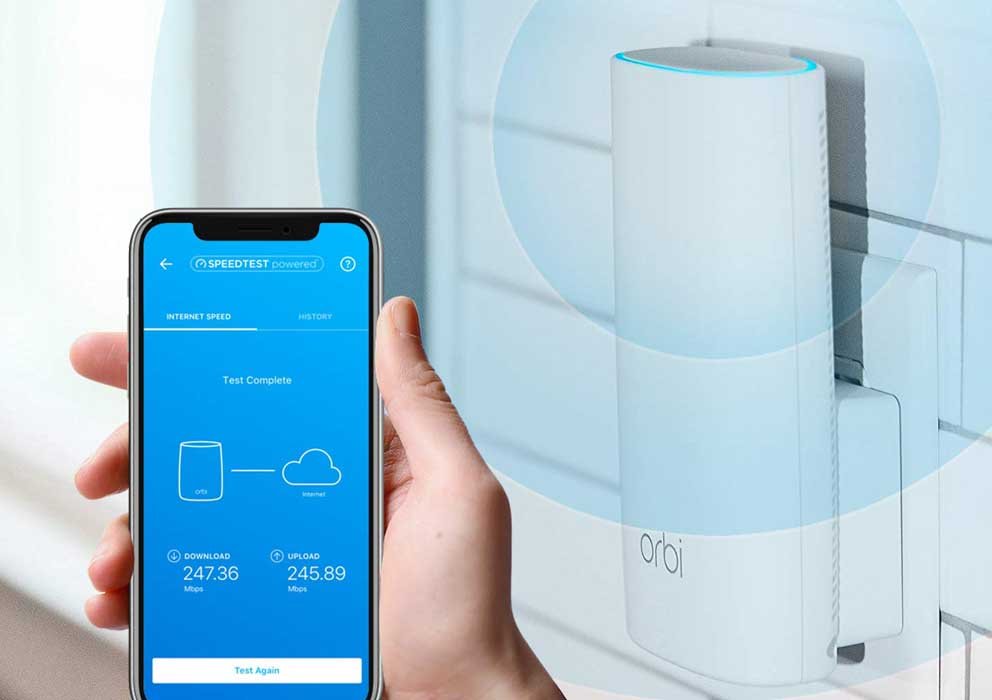
- Get back to the Itgeeks Support app and wait for the progress bar on it to show the starting status of your Itgeeks Support router.
- Now, choose a network name and password for your Itgeeks Support WiFi system.
- Tap Next and select security questions you want to answer.
- As soon as you are done with answering the questions, hit Continue.
- Unplug the Itgeeks Support satellite and place it at your desired location.
That’s all! You have now completed the Itgeeks Support setup process. All you need to do now is connect your client devices to the network of your Itgeeks Support and start using the internet the way you fancy. Whether you own Itgeeks Support RBK50v, RBK50, CBK40, CBK43, CBK752, or CBK753, RBK852 setup steps are given above will work the same for all the Itgeeks Support models. However, the list of models supporting the above-given Itgeeks Support setup process is endless.
How to access New Itgeeks Support router?
- First of all, connect your Itgeeks Support router to the electronic equipment
- Now, activate your pc or portable computer.
- Launch your favorite web browser.
- In the URL bar, kind Itgeeks Supportlogin internet and press Enter.
- Now, the Itgeeks Support log in window can comes on your computer's screen
- Enter Itgeeks Support admin credentials and hit Login.

Setting up a New Itgeeks Support Network in your home provides you a fast, stable, and uninterrupted WiFi connection
The Itgeeks Support is an advanced Wi-Fi router cum system designed for modern users who need faster Internet connectivity. New Itgeeks Support Router can be purchased as a single router or with the system as per your requirements. You can even go with the 3 pack router system to connect your entire home with a faster and reliable connection.
Steps for New Itgeeks Support Router Setup Manually
- Sync your Itgeeks Support router as well as the satellite. In order to do so, press the Sync button on the router, then on the satellite.
- Wait for a couple of seconds.
- Launch an internet browser on your laptop. You are free to choose any browser that you like.Just ensure that it is running on its updated version.
- Type the default web address of your Itgeeks Support into the address bar.
- Press the Enter key.
- You will land on the Itgeeks Support login page and will be asked to enter the default login credentials of your device.
- So, under their respective fields, enter the default username and password.
- Click Log In.
- Once the Itgeeks Support setup wizard comes into view, follow the on-screen prompts.
Steps for New Itgeeks Support Router Setup without Itgeeks Support App
Setting your Itgeeks Support is now possible even without an Itgeeks Support app. As a matter of fact, users can browse the default setup page from any relevant web browser and configure their Itgeeks Support router satellite even if they do not install an Itgeeks Support application.
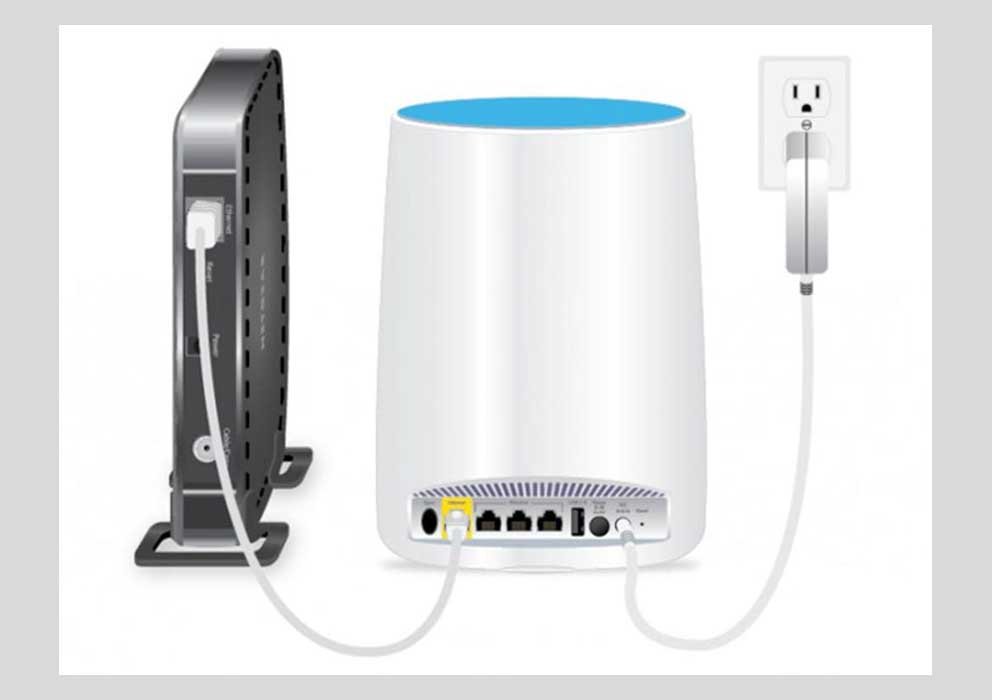
- Unplug your main modem. Disconnect its connected wires as well. Leave it unplugged. Plug it back after a few minutes.
- Remove the backup battery. Replace it. After replacing its battery, reconnect its disconnected wires.
- Now, grab the Ethernet cable you received with the installation kit. Plugin its one end to the yellow-colored internet port and another ends into Ethernet port of your existing modem.
- After that, connect the power cord of your Itgeeks Support router into a working power outlet. Turn it on. See whether the LED on it has started blinking or not. If not, push the power (on/off) button once.
- Wait for the ring LED on it become solid white.
- Place the Itgeeks Support in the central location of your house in order to get maximum coverage.
- Plug it in.
- Wait until the ring LED light of your Itgeeks Support satellite becomes solid white and after that, flashes the blinking magenta color. As a matter of fact, the ring LED light of the Itgeeks Support satellite blinks magenta for a couple of minutes when it tries to sync with a Itgeeks Support WiFi router.

What Do Different Lights on Itgeeks Support Satellite Mean?
- Blue: Your Itgeeks Support router and the satellite successfully synced, and the connection between the Itgeeks Support and the Satellite is Set it up.
- Amber: Your Itgeeks Support router and the satellite successfully synced, and the connection between the router and satellite is fair. You need to change the place of the Itgeeks Support satellite closer to the Itgeeks Support Router.
- Magenta: Sadly, your Itgeeks Support router and the satellite failed to sync. You need to move the satellite closer to the router and try again.
How to update Itgeeks Support firmware through Itgeeks Supportlogin.com automatically?
- Connect your computer or any compatible device to the Itgeeks Support Home WiFi network.
- Launch any web browser on the connected device.
- Open Itgeeks Supportlogin.com or www.Itgeeks Supportlogin.com from the browser.
- On the login page, enter the router's username and admin password.
- Do not use WiFi password in the admin password field.
- Now you can see the Itgeeks Support dashboard.
- Click on the Administration option to get the Itgeeks Support Firmware Update page.
- On this Firmware Update page, you will see two options. A.Online update B. Manual Update
- In Online update options, you will see the details of your Itgeeks Support model and the current firmware version of the Itgeeks Support router and each satellite. Click on the check button to get know the information about the latest version of firmware and then click on update all.
- Now please wait for three to four minutes until the Itgeeks Support Firmware update is done.
- Your router will start rebooting in between the process. Connect your wireless device again once the LED lights on the router get stable.
- On the Online Update screen, now you can see the details of the current firmware version.
Some Basic Points Why Itgeeks Support Router Not Connecting To Satellite
- Power Issues.
- Your Itgeeks Support devices do not sync properly.
- Itgeeks Support Router Firmware is not up-to-date.
- Satellites are not placed in a good network location.
- Technical Glitches
Installation Itgeeks Support WiFi 6 System RBK753:
- First of all, you need to unbox your Netgear Itgeeks Support RBK753. Keep any user manuals or accessories with care.
- Now, choose a clean and dry place to place your Itgeeks Support. Find a place where there is an active wall socket available so that you can plug the Itgeeks Support device in.
- Next, plug the power adapter into the wall socket and turn the power button on.
- It is now time to get hold of your smartphone. Unlock your phone and head toward Play Store or App Store.
- In the search bar, type Netgear Itgeeks Support app, and when the search results show up, tap on the correct result to begin downloading the app.
- Right after the Netgear Itgeeks Support app is installed, tap on the icon and launch it.
- Accept the terms and conditions by clicking on the ‘I agree’ option.
- After answering a few prompts, you will see a form open up.
- Fill in the required details and create an Itgeeks Support account.
- As soon as the Itgeeks Support account has been created, you will be asked to set up your Itgeeks Support device.
- So, keep following the instructions that you view on your screen and get through the process.
How do I log into my router with Itgeeks Support app?
- First of all, download the Itgeeks Support app on your smartphone from the app store.
- Install the app and open it.
- Connect the phone to the Itgeeks Support network and you will no sooner find the same login page appears on the screen.
- Enter the username and the password to log in.
- Press 'Sign-in' to complete the login process.
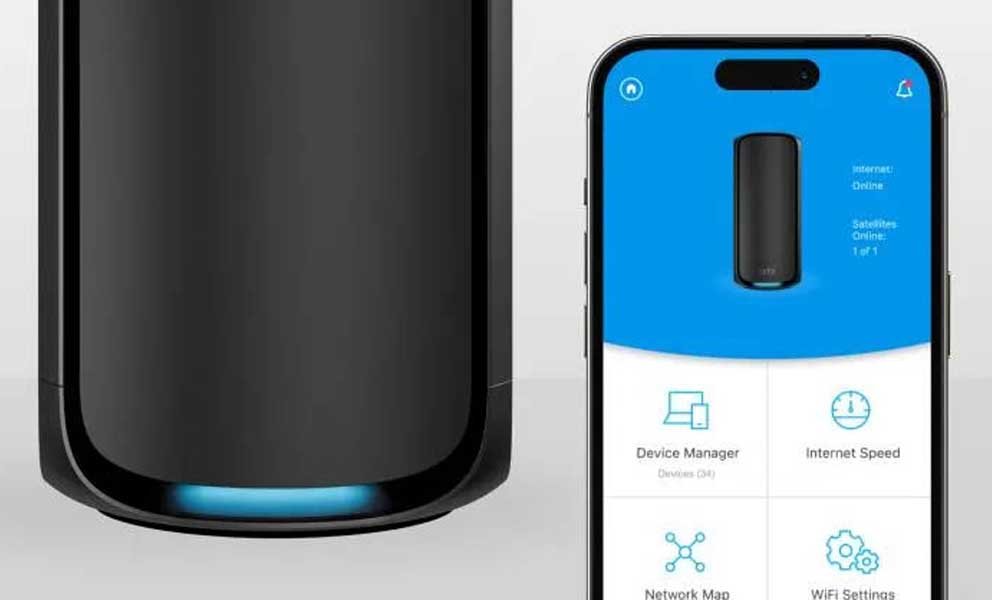
How do I change my Itgeeks Support password through the Itgeeks Support app?
- Launch the Itgeeks Support app from a device that is connected to your Itgeeks Support WiFi network.
- Enter your user name and password and tap SIGN IN. The Dashboard displays.
- Tap WiFi Settings.
- Enter the new SSID or New WiFi Name in the Itgeeks Supportlogin Page.
- Enter the new password or WiFi Password on the Itgeeks Supportlogin Page.
- Click SAVE to save the new settings.

Change your Itgeeks Support WiFi password by using a web Browser:
- Open a web browser from a computer or mobile device that is connected to your Itgeeks Support network.
- Enter http://Itgeeks Supportlogin.com. Login window displays.
- Enter the username and password. The username always remains the admin.Use the Itgeeks Support default password is password. The user name and password need to be case-sensitive. The BASIC Home page displays.
- Select Wireless. To change the network name (SSID), type a new name in the Name (SSID) field.
- To change the password, type a new password in the Password (Network Key) field. Click the Apply button. Your settings are saved.

How Do I Setup My Itgeeks Support WiFi Extender?
The Itgeeks Support is an advanced Wi-Fi router cum system designed for modern users who need faster Internet connectivity. Itgeeks Support Router can be purchased as a single router or with the system as per your requirements. You can even go with the 3 pack router system to connect your entire home with a faster and reliable connection.
Frequently Asked Questions
Where To Find The Model Number Of My Netgear Products?
The Model number of the Netgear Itgeeks Support is available on the back panel of the Router. Right behind the Netgear Heading.
How Do I Find My Itgeeks Support Admin Password?
You can find Itgeeks Support admin details on the device. If you can’t find the username and password on the device, then you can look for the same on the manual that comes with the device. You can also find the Itgeeks Support admin details on the Itgeeks Support official website.
How Do I Change The Password For Www.Routerlogin.Net Login?
You just simply need to log in via Itgeeks Supportlogin.com or Itgeeks Supportlogin.net.
How To Restart Itgeeks Support Wifi System?
You can restart your Itgeeks Support by pressing ‘Power’ button on the device.
How Do I Reset Itgeeks Support Router?
At the back of your Itgeeks Support Router “Reset” button is available. Take a paperclip or any likewise object to press and hold it for 10 seconds. When Netgear Router will start blinking amber, it means it is reset.
Itgeeks Support App Login Fails On New Smartphone?
Turn on your Itgeeks Support router as well as Satellite.
Check if the Itgeeks Support app is up-to-date or not. If it is not, then update the app.
Can't Connect To Itgeeks Support Wifi?
Plugin Itgeeks Support device to a wall outlet.
Now, power cycle your Itgeeks Support WiFi System, Satellite, and modem.
If the internet starts working now, then the problem is fixed, otherwise, keep following the steps
Open a web browser, go to ‘Settings and then, delete history, cache, and cookies.
If the issue still exists, then use a different web browser.
In the web browser, enter the default IP address of Itgeeks Support.
If the default IP address doesn’t open, then reset your Itgeeks Support WiFi system.
Need Help? Support
Call Us